Install and Running Jupyter notebook on ARM64
Introduction
Jupyter Notebooks allow data scientists to create and share their documents, from codes to full blown reports. They help data scientists streamline their work and enable more productivity and easy collaboration. Due to these and several other reasons you will see below, Jupyter Notebooks are one of the most popular tools among data scientists.
- Data visualizations. Most people have their first exposure to Jupyter Notebook by way of a data visualization, a shared notebook that includes a rendering of some data set as a graphic. Jupyter Notebook lets you author visualizations, but also share them and allow interactive changes to the shared code and data set.
- Code sharing. Cloud services like GitHub and Pastebin provide ways to share code, but they’re largely non-interactive. With a Jupyter Notebook, you can view code, execute it, and display the results directly in your web browser.
- Live interactions with code. Jupyter Notebook code isn’t static; it can be edited and re-run incrementally in real time, with feedback provided directly in the browser. Notebooks can also embed user controls (e.g., sliders or text input fields) that can be used as input sources for code.
- Documenting code samples. If you have a piece of code and you want to explain line-by-line how it works, with live feedback all along the way, you could embed it in a Jupyter Notebook. Best of all, the code will remain fully functional—you can add interactivity along with the explanation, showing and telling at the same time.
It was earlier known as IPython notebook.
The name Jupyter is an acronym which stands for the three languages it was designed for: JUlia , PYThon, and R.
Prerequisites
- Python 3
- pip
- Python venv
- zeromq
Python 3.6.7 |
Create a virtual environment for Jupyter Notebook
|
Essentially, pyvenv sets up a new directory that contains a few items which we can view with the ls command:
|
Set up zeromq
# Check installed # Expected |
Installing Jupyter Notebook
Jupyter notebook can be installed in either of two ways:
- Using Anaconda
- Using pip
Here we will install using pip.
Upgrade pip and install jupyter
|
When the installation had completed, you will then be able to run Jupyter notebook with the following command:
Running Jupyter Notebook Server
When the installation had completed, you will then be able to run Jupyter notebook with the following command:
[I 08:58:24.417 NotebookApp] Serving notebooks from local directory: /Users/linaro [I 08:58:24.417 NotebookApp] 0 active kernels [I 08:58:24.417 NotebookApp] The Jupyter Notebook is running at: http://localhost:8888/ [I 08:58:24.417 NotebookApp] Use Control-C to stop this server and shut down all kernels (twice to skip confirmation). |
Connecting to Jupyter Notebook using SSH Tunneling
After running this command, you will see output similar to the following:
Output |
You might notice in the output that there is a No web browser found warning. This is to be expected, since the application is running on a server and you likely haven't installed a web browser onto it.
For now, exit the Jupyter Notebook by pressing CTRL+C followed by y, and then pressing ENTER to confirm:
Jupyter Notebook is now installed on the server. However, in order to access the application and start working with notebooks, you'll need to connect to the application using SSH tunneling and a web browser on your local computer.
Output |
Then log out of the server by using the exit command:
|
SSH tunneling is a simple and fast way to connect to the Jupyter Notebook application running on the server.
SSH Tunneling using macOS or Linux
If your local computer is running Linux or macOS, it's possible to establish an SSH tunnel just by running a single command.
ssh is the standard command to open an SSH connection, but when used with the -L directive, you can specify that a given port on the local host (that is, your local machine) will be forwarded to a given host and port on the remote host (in this case, your server). This means that whatever is running on the specified port on the remote server (8888, Jupyter Notebook's default port) will appear on the specified port on your local computer (8000 in the example command).
To establish your own SSH tunnel, run the following command. Feel free to change port 8000 to one of your choosing if, for example, 8000 is in use by another process. It is recommended that you use a port greater than or equal to 8000, as those port numbers are unlikely to be used by another process. Be sure to include right server IP address and the user to connect to the server
|
If there are no errors from this command, it will log you into your remote server. From there, we need to activate the virtual environment we had setup earlier:
|
Now, run the Jupyter Notebook application:
|
To connect to Jupyter Notebook, use your favorite web browser to navigate to the local port on the local host: http://localhost:8000.
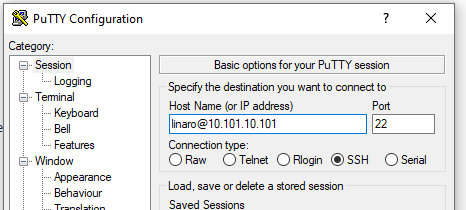
SSH Tunneling using Windows and PuTTY
PuTTY is an open-source SSH client for Windows which can be used to connect to linux server. After downloading and installing PuTTY on your Windows machine (as described in the prerequisite tutorial), open the program and enter your server URL or IP address, as shown here:
Next, click + SSH at the bottom of the left pane, and then click Tunnels. In this window, enter the port that you want to use to access Jupyter on your local machine (8000 ). It is recommended to use a port greater or equal to 8000 as those port numbers are unlikely to be used by another process. If 8000 is used by another process, though, select a different, unused port number. Next, set the destination as localhost:8888, since port 8888 is the one that Jupyter Notebook is running on. Then click the Add button and the ports should appear in the Forwarded ports field:

Finally, click the Open button. This will both connect your machine to the server via SSH and tunnel the desired ports. If no errors show up, go ahead and activate your virtual environment:
|
Now, run the Jupyter Notebook application:
|
To connect to Jupyter Notebook, use your favorite web browser to navigate to the local port on the local host: http://localhost:8000.
Using Jupyter Notebook
After navigating to http://localhost:8000, you will be presented with a login page:

In the Password or token field at the top, enter the token shown in the output after you ran jupyter notebook from your server:
Output |
Alternatively, you can copy that URL from your terminal output and paste it into your browser's address bar.
Automatically, Jupyter notebook will show all of the files and folders stored in the directory from which it's run.
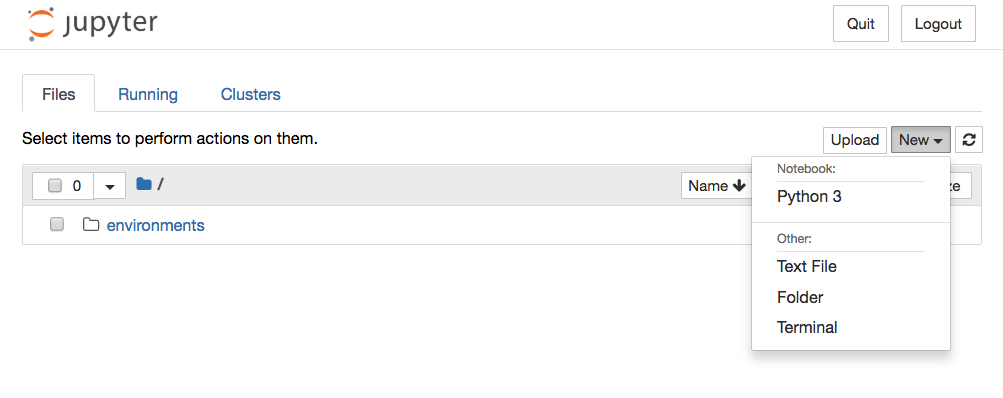
When accessed through a web browser, Jupyter Notebook provides a Notebook Dashboard which acts as a file browser and gives you an interface for creating, editing and exploring notebooks. Think of these notebooks as documents (saved with a .ipynb file extension) which you populate with any number of individual cells. Each cell holds an interactive text editor which can be used to run code or write rendered text.
Create a new notebook file by clicking New then Python 3 at the top-right of the Notebook Dashboard:
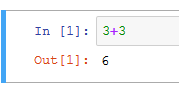
Type in 3+3 in the input box and press Ctrl+Enter to see the output
Creating a directory to keep your Jupyter Notebook documents
Once you had installed Supervisor, you can proceed with creating a directory to keep your Jupyter Notebook documents. For example, you can run the following command to create the contents directory inside the ~/jupyter directory:
|
Creating a shell script to run Jupyter Notebook within the virtual environment
Next, proceed to create a shell script to run Jupyter Notebook. In order to do so, run the following command to create a shell script at ~/jupyter/run-jupyter-notebook.sh:
|
When the editor loads, create the following content:
|
After you had done so, press Esc followed by :wq to save the file. Once you had saved the file, make the file executable by running the following command:
|
Running Jupyter Lab
Jupyter lab provides a very developer friendly environment to create notebooks. You will need to install Jupyter lab for this to work.
|
Once installed, you can run the jupyter lab in jupyter virtual environment by:
|
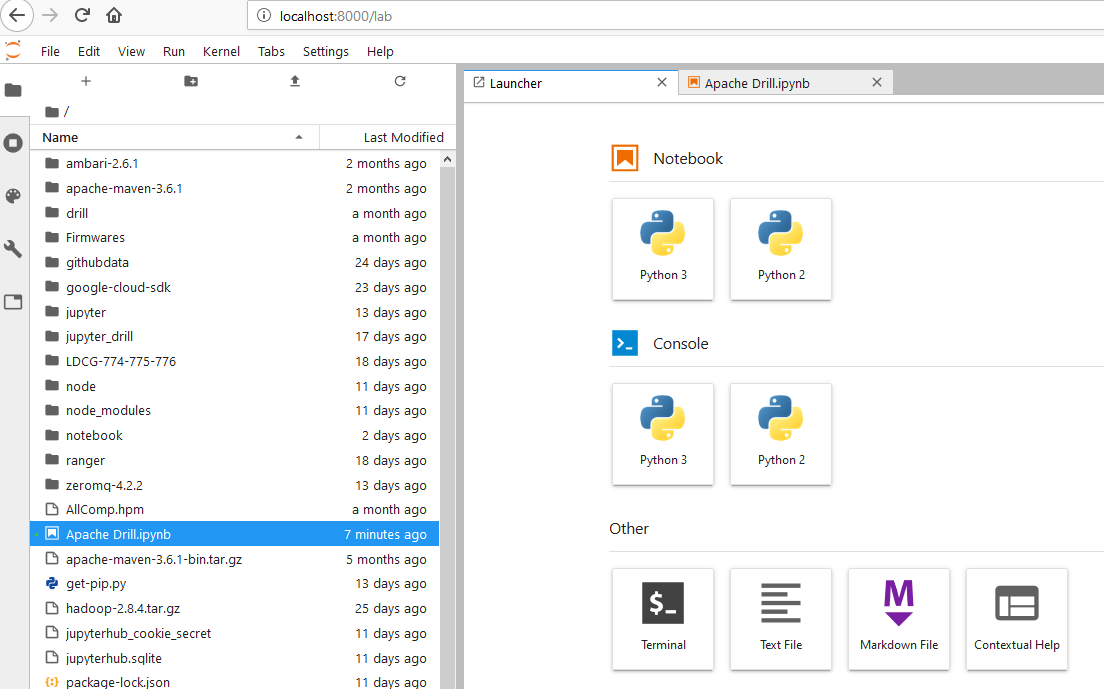
Once jupyter lab is running, you can open the notebook in browser, if the ssh tunnel is setup going to http://localhost:8000/lab
Running Jupyter Notebook as a server daemon
Each time the server is restarted, at this time, you will need to activate your virtual environment and start your Jupyter Notebook. In order to make Jupyter Notebook run whenever the server is restarted, Jupyter needs to run as a server daemon.
Creating the Supervisor configuration file to run Jupyter Notebook
In order to get Supervisor to run Jupyter Notebook, you will need to create a Supervisor configuration file. Run the following command to create a configuration file at /etc/supervisor/conf.d/jupyter-notebook.conf:
|
Once the editor appears, create the following content:
|
After you had done so, press Esc followed by :wq to save the file.
Once you had saved /etc/supervisor/conf.d/jupyter-notebook.conf, run the following command to restart Supervisor:
$ |
When Supervisor had restarted successfully, it will run your Jupyter Notebook for you.
How do I open a specific Notebook?
The following code should open the given notebook in the currently running notebook server, starting one if necessary.
|
How do I start the Notebook using a custom IP or port?
By default, the notebook server starts on port 8888. If port 8888 is unavailable or in use, the notebook server searches the next available port. You may also specify a port manually. In this example, we set the server’s port to 9999:
|