.Build Apache Drill v1.0
<In-Progress>
Pre-requisites
- OpenJDK8
- Zookeeper
- git
- maven@v3.3.9
Install OpenJDK
$ sudo apt-get install openjdk-8-jdk |
Make sure you have the right OpenJDK version
|
It should display 1.8.0_111
Set JAVA_HOME
|
Building Apache Zookeeper
Some distributions like Ubuntu/Debian comes with latest zookeeper. Hence you can just install using apt-get command "sudo apt-get install zookeeper". If your distribution does not come with zookeeper then just go for latest download and unzip the Zookeeper package from Official Apache archive in all machines that will be used for zookeeper quorum as shown below:
|
Edit the /etc/hosts file across all the nodes and add the ipaddress and hostname (nodenames). If the hostnames are not right, change them in /etc/hosts file
|
Create zookeeper user
|
Configure zookeeper
To make an ensemble with Master-slave architecture, we needed to have odd number of zookeeper server .i.e.{1, 3 ,5,7....etc}.
Now, Create the directory zookeeper under /var/lib folder which will serve as Zookeeper data directory and create another zookeeper directory under /var/log where all the Zookeeper logs will be captured. Both of the directory ownership need to be changed as zookeeper.
|
Edit the bashrc for the zookeeper user via setting up the following Zookeeper environment variables.
|
Source the .bashrc in current login session:
$ source ~/.bashrc |
Create the server id for the ensemble. Each zookeeper server should have a unique number in the myid file within the ensemble and should have a value between 1 and 255.
In Node1
$ sudo sh -c "echo '1' > /var/lib/zookeeper/myid" |
In Node2
$ sudo sh -c "echo '2' > /var/lib/zookeeper/myid" |
In Node3
$ sudo sh -c "echo '3' > /var/lib/zookeeper/myid" |
Now, go to the conf folder under the Zookeeper home directory (location of the Zookeeper directory after Archive has been unzipped/extracted).
$ cd /home/zookeeper/zookeeper-3.4.13/conf/ |
By default, a sample conf file with name zoo_sample.cfg will be present in conf directory. Make a copy of it with name zoo.cfg as shown below, and edit new zoo.cfg as described across all the nodes.
$ cp zoo_sample.cfg zoo.cfg |
Edit zoo.cfg and the below
$ vi zoo.cfg |
|
Now, do the below changes in log4.properties file as follows.
$ vi log4j.properties |
zookeeper.log.dir=/var/log/zookeeperzookeeper.tracelog.dir=/var/log/zookeeperlog4j.rootLogger=INFO, CONSOLE, ROLLINGFILE |
After the configuration has been done in zoo.cfg file in all three nodes, start zookeeper in all the nodes one by one, using following command:
$ /home/zookeeper/zookeeper-3.4.12/bin/zkServer.sh start |
Zookeeper Service Start on all the Nodes.
ZooKeeper JMX enabled by default |
The log file will be created in /var/log/zookeeper of zookeeper named zookeeper.log, tail the file to see logs for any errors.
$ tail -f /var/log/zookeeper/zookeeper.log |
Verify the Zookeeper Cluster and Ensemble
In Zookeeper ensemble out of three servers, one will be in leader mode and other two will be in follower mode. You can check the status by running the following commands.
$ /home/zookeeper/zookeeper-3.4.13/bin/zkServer.sh status |
Zookeeper Service Status Check.
In Zookeeper ensemble If you have 3 nodes, out of them, one will be in leader mode and other two will be in follower mode. You can check the status by running the following commands. If you have just one then it will be standalone.
With three nodes:
node1
ZooKeeper JMX enabled by default |
node2
ZooKeeper JMX enabled by default |
node3
ZooKeeper JMX enabled by default |
standalone
ZooKeeper JMX enabled by default |
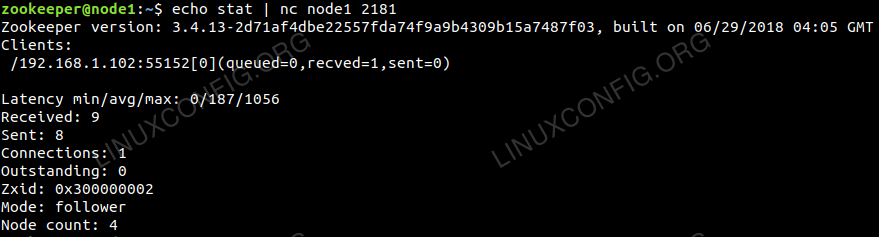
$ echo stat | nc node1 2181 |
Lists brief details for the server and connected clients.
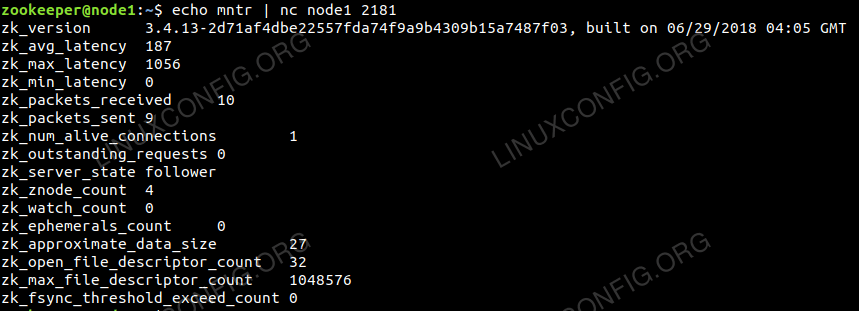
$ echo mntr | nc node1 2181 |
Zookeeper list of variables for cluster health monitoring.
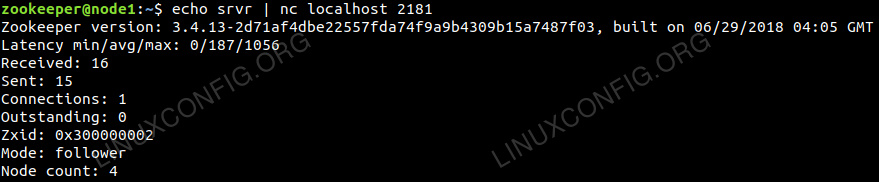
$ echo srvr | nc localhost 2181 |
Lists full details for the Zookeeper server.
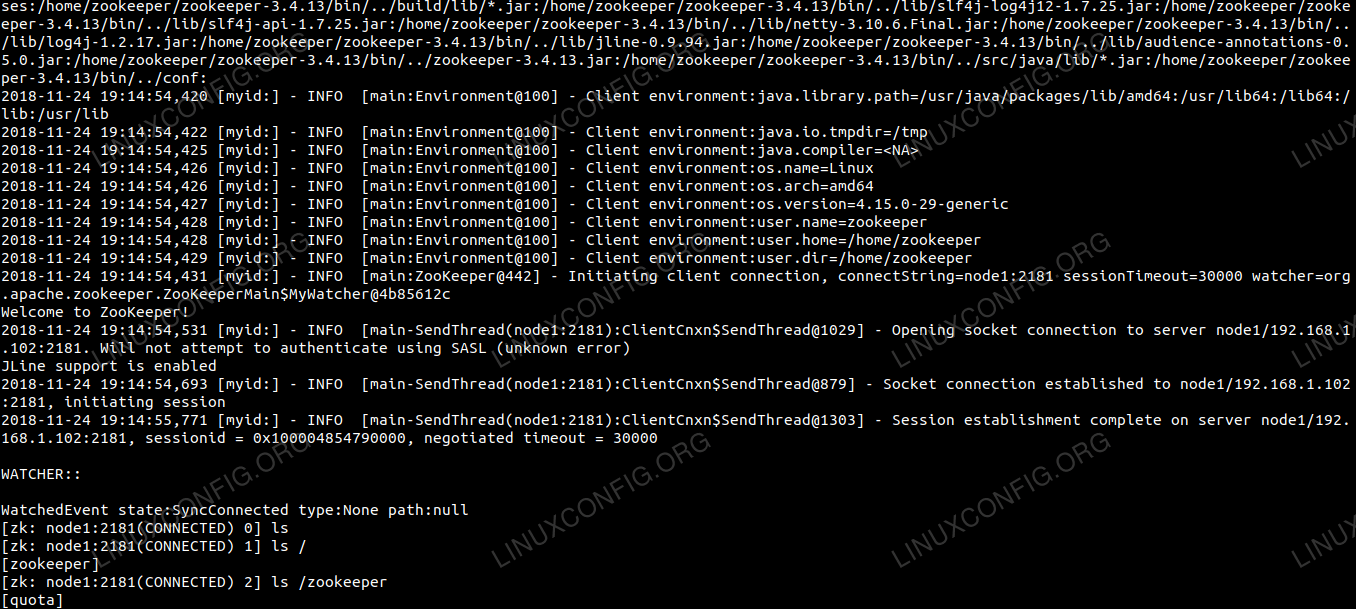
If you need to check and see the znode, you can connect by using the below command on any of the zookeeper node:
$ /home/zookeeper/zookeeper-3.4.12/bin/zkCli.sh -server `hostname -f`:2181 |
Connect to Zookeeper data node and lists the contents.
ent:user.name=root
2019-02-18 02:26:36,822 [myid:] - INFO [main:Environment@100] - Client environm
ent:user.home=/root
2019-02-18 02:26:36,822 [myid:] - INFO [main:Environment@100] - Client environm
ent:user.dir=/home/ganesh
2019-02-18 02:26:36,823 [myid:] - INFO [main:ZooKeeper@441] - Initiating client
connection, connectString=:2181 sessionTimeout=30000 watcher=org.apache.zookeep
er.ZooKeeperMain$MyWatcher@4b9af9a9
Welcome to ZooKeeper!
2019-02-18 02:26:36,846 [myid:] - INFO [main-SendThread(localhost:2181):ClientC
nxn$SendThread@1028] - Opening socket connection to server localhost/127.0.0.1:2
181. Will not attempt to authenticate using SASL (unknown error)
JLine support is enabled
2019-02-18 02:26:36,927 [myid:] - INFO [main-SendThread(localhost:2181):ClientC
nxn$SendThread@878] - Socket connection established to localhost/127.0.0.1:2181,
initiating session
2019-02-18 02:26:36,948 [myid:] - INFO [main-SendThread(localhost:2181):ClientC
nxn$SendThread@1302] - Session establishment complete on server localhost/127.0.
0.1:2181, sessionid = 0x1000001cfe00002, negotiated timeout = 30000
WATCHER::
WatchedEvent state:SyncConnected type:None path:null
[zk: :2181(CONNECTED) 0]
Install Pre-requisites for Build
|
Setup environment
Add environment variables to profile file
|
$ source ~/.bashrc |
Hooking up upstream Maven 3.6.0 (for Debian Jessie only)
|
Clone and Build Apache Drill
|
To build .deb package
|
To build .rpm package
|
After successful compilation. Edit your computer /etc/hosts file and make sure that the loopback is commented. e.g. and replace with your host <IP-Address>
|
|
Because in distributed mode the loopback IP 127.0.1.1 cannot be binded reference https://stackoverflow.com/questions/40506221/how-to-start-drillbit-locally-in-distributed-mode
Next you need to edit the conf/drill-override.conf and change the zookeeper cluster ID e.g. as below
|
Now you can run the drillbit and watchout the log. To play more with drillbit you can refer drill-override-example.conf file.
|
In one of the terminal switch on the logs with the tail command
|
You can either stop or do a graceful stop. We can repeat the same steps on more than one machines (nodes).
I could able to run the Drill and access the http://IP-Address:8047 and run a sample querry in distributed mode. So In order to do in a distributed mode. I just need to do a similar setup on multiple machines (nodes). Reference - https://drill.apache.org/docs/starting-the-web-ui/
If you are using the CentOS 7 you should be little careful because the connection errors may be caused because of the firewall issues. I have used below set of commands to disable the firewall.
|
REFERENCE:
https://stackoverflow.com/questions/13316776/zookeeper-connection-error
https://www.tutorialspoint.com/zookeeper/index.htm
https://blog.redbranch.net/2018/04/19/zookeeper-install-on-centos-7/
https://drill.apache.org/docs/distributed-mode-prerequisites/